# Overview
Mosaic - a technology for developing extensible apps
### Features
**🧞 Plugins**
[**Plugins**](/develop-an-extension/plugins) can easily stack onto one another, such way modifying the same place of the application multiple times. It is recommended to use the plugin system to implement functionality reusable among several projects.
Initial code
{% code title="@creator/application/src/index.js" %}
```javascript
/** @namespace Application/getData */
const getData = () => {
return ['Initial data'];
}
const data = getData();
```
{% endcode %}
With this plugin
{% code title="@creator/extension/src/plugin/some.plugin.js" %}
```javascript
const plugin = (args, callback, context) => {
const data = callback(...args); // ['Initial data']
return [
...data,
'Data from the plugin'
];
};
module.exports = {
'Application/getData': {
function: plugin
}
}
```
{% endcode %}
Produces this
```javascript
['Initial data', 'Data from the plugin']
```
{% content-ref url="/pages/-MXlBPS7QgZYqeJwuq5V" %}
[Extensions](/hands-on-guides/quick-start)
{% endcontent-ref %}
**📔 Shadowing (Overrides)**
[**Overrides**](/themes/parent-themes) of [**parent themes**](/themes/extensions-and-themes) are the base of the theming mechanism. Use overrides to build your application on top of a parent application.
Initial code in the parent theme
{% code title="parent-ts-react-app/src/App.tsx" %}
```typescript
export class App extends PureComponent<{}, {}> {
renderContent() {
return This is written in the parent theme in TS
;
}
render() {
return (
{ this.renderContent() }
);
}
}
export default App;
```
{% endcode %}
With this override in the child theme
{% code title="react-app/src/App.js" %}
```javascript
import ParentApp from 'Parent/App';
export class App extends ParentApp {
renderContent() {
return (
<>
This is written in the child theme in JS
{ super.renderContent() }
);
}
}
export default App;
```
{% endcode %}
Produces this HTML output
```markup
This is written in the child theme in JS
This is written in the parent theme in TS
```
{% content-ref url="/pages/-MZY1nhRIRqmQjhooOY3" %}
[Themes](/hands-on-guides/quick-start-1)
{% endcontent-ref %}
### Why use Mosaic?
**🔌 Make your application extensible**
By using Mosaic plugins, you may make any part of your project extensible and modifiable either from within the application itself or from installed Mosaic modules.
**🍇 Use granular micro-frontend architecture**
Make dependencies injected with plugins instead of importing them! This way, you keep ALL the logic related to the module WITHIN the module, even its use cases!
**🖌️ Theming**
Build your project by overriding an existing project's functionality! Have infinite amount of parent projects. Similar to straight up forking, but with actual core updating potential.
**🤝 Integrations with existing technologies**
No manual configuration tinkering required, we got you covered 🤝
There are several ways on how to get Mosaic in your application - we support [Next.js](/getting-started/nextjs), [create-react-app](/getting-started/create-react-app), and simple [Webpack](/getting-started/webpack) installation. Some other technologies are coming soon, stay tuned 😎
# Next.js
In order to integrate Mosaic into a Next.js project, the following steps should be performed
#### Install the dependencies
Using mosaic requires two packages in your Next.js project - the start script package and the runtime package.
{% tabs %}
{% tab title="yarn" %}
```javascript
yarn add @tilework/mosaic-nextjs-scripts @tilework/mosaic
```
{% endtab %}
{% tab title="npm" %}
```javascript
npm install @tilework/mosaic-nextjs-scripts @tilework/mosaic
```
{% endtab %}
{% endtabs %}
#### Use the new scripts
Replace `next` invocations in the `scripts` block of your package.json. Such way, Next.js will be launched with additional configurations (Webpack and Babel) required for Mosaic.
{% code title="package.json" %}
```diff
{
"scripts": {
- "dev": "next",
+ "dev": "nextjs-scripts dev",
- "build": "next build",
+ "build": "nextjs-scripts build",
- "start": "next start",
+ "start": "nextjs-scripts start",
+ "link": "nextjs-scripts link",
+ "test": "nextjs-scripts test"
}
}
```
{% endcode %}
#### Clean up
`next` is a dependency of `mosaic-nextjs-scripts`, thus is no longer needed in your project as a direct dependency. It is advised to remove this redundant dependency.
{% tabs %}
{% tab title="yarn" %}
```diff
yarn remove next
```
{% endtab %}
{% tab title="npm" %}
```diff
npm uninstall next
```
{% endtab %}
{% endtabs %}
# Create React App
In order to integrate Mosaic into a create-react-app project, the following steps should be performed
#### Install the dependencies
Using mosaic requires two packages in your create-react-app project - the start script package and the runtime package.
{% tabs %}
{% tab title="yarn" %}
```javascript
yarn add @tilework/mosaic-cra-scripts @tilework/mosaic
```
{% endtab %}
{% tab title="npm" %}
```javascript
npm install @tilework/mosaic-nextjs-scripts @tilework/mosaic
```
{% endtab %}
{% endtabs %}
#### Use the new scripts
Replace `react-scripts` invocations in the `scripts` block of your package.json. Such way, the build process will be launched with additional configurations (Webpack and Babel) required for Mosaic.
{% code title="package.json" %}
```javascript
{
"scripts": {
"start": "cra-scripts start",
"build": "cra-scripts build",
"test": "cra-scripts test",
"link": "cra-scripts link"
}
}
```
{% endcode %}
# Webpack
In order to integrate Mosaic into a Webpack-powered project, the following steps should be performed
#### Install the dependencies
Using mosaic requires three packages in your Webpack-powered project - the configuration injection package, the runtime package and the helper package for linking local dependencies.
{% tabs %}
{% tab title="yarn" %}
```javascript
yarn add @tilework/mosaic-config-injectors @tilework/mosaic @tilework/mosaic-node-scripts
```
{% endtab %}
{% endtabs %}
#### Inject the configuration
In this scenario (using own Webpack configuration), you are required to manually inject that configuration. The integration packages for Next.js and create-react-app do exactly this under the hood.
{% tabs %}
{% tab title="Without initial Babel" %}
{% code title="webpack.config.js" %}
```javascript
const webpack = require('webpack');
const { injectWebpackConfig } = require('@tilework/mosaic-config-injectors');
module.exports = injectWebpackConfig({
// Your webpack configuration
context: ...
}, {
webpack
});
```
{% endcode %}
{% endtab %}
{% tab title="With initial Babel" %}
{% code title="webpack.config.js" %}
```javascript
const webpack = require('webpack');
const {
injectWebpackConfig,
injectBabelConfig
} = require('@tilework/mosaic-config-injectors');
module.exports = injectWebpackConfig({
// Your webpack configuration
module: {
rules: [{
test: /\.jsx?$/,
exclude: /node_modules/,
use: {
loader: 'babel-loader',
// Babel configuration should be injected as well!
options: injectBabelConfig({ presets: ['@babel/preset-env'] })
}
}]
},
}, {
webpack
});
```
{% endcode %}
{% endtab %}
{% endtabs %}
{% hint style="info" %}
You may be asked to provide additional fields to your webpack configuration, or additional options to the configuration injector itself.
{% endhint %}
# Extensions
Start using extensions and runtime plugins
{% hint style="info" %}
This guide is an entry point for working with extensions
{% endhint %}
## What is an extension
**Extension** is a reusable, isolated part of your application. It can contain any kind of source logic modifications, source being either a [theme](/themes/extensions-and-themes) or an extension.
**Extensions** allow to modify the source logic **without editing the source code**. The idea is to write additional logic - [plugins](/develop-an-extension/plugins), in order to intercept the initial logic and modify it in runtime.
[Build configuration](/develop-an-extension/build-configuration-plugins) (webpack and babel) can also be modified from extensions.
## Initialize a project
Assuming that you have some project you are willing to use mosaic in, install Mosaic in your project by following any setup guide: [Next.js](/getting-started/nextjs), [CRA](/getting-started/create-react-app) or [Webpack](/getting-started/webpack). If you want to start a project from scratch, just create it with Next, CRA or manually with Webpack and follow the same steps.
## Prepare the source logic
A [namespace](/develop-an-extension/namespaces#namespace) should be set for the piece of functionality we are **willing to make available for plugins**. Using the "[magic comment](/develop-an-extension/namespaces#how-namespace-comments-work)" syntax is the most convenient option to do it. Our Babel plugin transforms this syntax into a simple function invocation.
In this guide, you will operate with the code depicted below, located in the corresponding directory.
{% tabs %}
{% tab title="Your code" %}
{% code title="./src/router.js" %}
```javascript
/* @namespace Router/getRoutes */
function getRoutes(options) {
return [
'/home',
'/my-account'
]
}
const routes = getRoutes(); // routes + additional routes (from plugins)!
app.setRoutes(routes)
```
{% endcode %}
{% endtab %}
{% tab title="After transpilation" %}
```javascript
const getRoutes = Mosaic.middleware(
function getRoutes(options) {
return [
// ...routes
]
},
'Router/getRoutes'
);
const routes = getRoutes();
// routes + additional routes (from plugins)!
// see the explanation below
app.setRoutes(routes)
```
{% endtab %}
{% endtabs %}
## Create a package
**Within** your project, create a directory for your Mosaic modules (extensions). Conventionally, it is `/packages`
```bash
.
├── 📁 packages/
│ └── 📁 @vendor/
│ └── 📁 additional-routes/
│ └── 📄 package.json
├── 📁 src/
│ └── 📄 router.js
└── 📄 package.json
```
**In that directory, create** a module with proper package.json [additional fields](/develop-an-extension/anatomy-of-an-extension#package-json), seen below. It is very **important** for this module to be recognised as Mosaic module by the plugin system.
{% code title="./packages/@vendor/additional-routes/package.json" %}
```javascript
{
"mosaic": {
"type": "extension"
}
}
```
{% endcode %}
## Install and enable the module
[Install](/install-an-extension/use-a-local-extension) it into the package it interacts with. Remember to launch one of the scripts below in order to apply your installation!
{% code title="./package.json" %}
```javascript
{
"scripts": {
...
// TODO provide a linker package
"postupdate": "...-scripts link",
"postinstall": "...-scripts link"
},
"dependencies": {
"@vendor/additional-route": "file:relative/path/to/the/module"
}
}
```
{% endcode %}
Remember to [enable](/install-an-extension/enable-or-disable-an-extension) it afterwards!
{% code title="package.json" %}
```javascript
{
"mosaic": {
"extensions": {
"@vendor/additional-route": true
}
}
}
```
{% endcode %}
## **Write a plugin**
Create a [plugin declaration file](/develop-an-extension/plugins#plugin-declaration-files) in the [proper directory](/develop-an-extension/anatomy-of-an-extension#file-structure) - `src/plugin/`
Remember that there is a naming convention for these files - their names should end with `.plugin.js`
[Manipulate](/develop-an-extension/plugins#implement-proxy-function) the initial logic as you wish! You may have several plugins on a single namespace, if they are compatible with each other all of them will work!
{% code title="packages/@vendor/additional-route/src/plugin/math.plugin.js" %}
```javascript
const plugin = (args, callback) => {
console.log(args); // [options]
console.log(callback); // function getRoutes(options) {...}
const originalRoutes = callback(...args); // ['/home', '/my-account']
const additionaloutes = ['/cart', '/contact-us'];
return [
...originalRoutes,
...additionalRoutes
];
};
export default {
'Router/getRoutes': {
function: plugin
}
}
```
{% endcode %}
## See it in work!
Let's launch the project and see what the initial code will give us. If you followed the guide correctly, you will see that the behavior of `getRoutes` function has changed and now it acts as follows!
It will also log some stuff into the console (explained above).
```javascript
const routes = getRoutes(); // ['/home', '/my-account', '/cart', '/contact-us']
```
## Acknowledge other extensions' features
The plugin system, although is one of the main features of Mosaic, is not the only one. To find out more about it, check out the [in-depth guide](/develop-an-extension/plugins) dedicated to it.
Extensions can contain not only runtime logic, but also build configuration modifications.
{% content-ref url="/pages/-MZNczryQsVK9W\_7dWCI" %}
[Build configuration plugins](/develop-an-extension/build-configuration-plugins)
{% endcontent-ref %}
# Themes
{% hint style="info" %}
This guide is an entry point for working with themes
{% endhint %}
## Concept
**To shadow** (**override**) - to create a file which will be used in the application instead of some other file. You can shadow files of any extension and any parent theme.
## Set up a parent theme
First of all, you will need to create a parent theme. A parent theme is a project that will be used as a base for a child theme, which will modify some of its functionality.
Let's have a parent theme configured as follows.
{% code title="./packages/@example/parent-theme/package.json" %}
```javascript
{
"name": "@example/parent-theme",
"mosaic": {
"type": "theme",
"themeAlias": "Parent"
}
}
```
{% endcode %}
And let's put the following file there. This file we are going to override a bit later.
{% code title="./packages/@example/parent-theme/src/data-source.js" %}
```javascript
export const SOME_VALUE = 42;
export class DataSource {
getData() {
return ['Source data'];
}
run() {
const data = this.getData();
console.log(data);
}
};
export default DataSource;
```
{% endcode %}
Also, let's use the functionality from above in that parent theme!
{% code title="./packages/@example/parent-theme/src/index.js" %}
```javascript
import DataSource from './data-source';
const dataSource = new DataSource();
dataSource.run()
```
{% endcode %}
The this parent theme will output the following logging. This will change when we introduce a child theme!
```javascript
['Source data']
```
## Set up a child theme
Then, let's create a **child theme**. A child theme will extend the parent theme's functionality and modify it.
We will configure the child theme as follows. We set the **parent theme** to the theme we have created above. It is important to [install](/install-an-extension/use-a-local-extension) the parent theme into this project!
{% code title="./package.json" %}
```javascript
{
"mosaic": {
"type": "theme",
"parentTheme": "@example/parent-theme"
},
"dependencies": {
"@example/parent-theme": "file:./packages/child-theme"
},
"scripts": {
"postinstall": "...-scripts link",
"postupdate": "...-scripts link"
}
}
```
{% endcode %}
## Shadow
In the child theme, we will create a file with the same path as above, and modify some functionality.
{% code title="./src/data-source.js" %}
```javascript
import {
DataSource as BaseDataSource,
SOME_VALUE
} from '@example/parent-theme';
export { SOME_VALUE };
export class DataSource extends BaseDataSource {
getData() {
return ['Data from the override'];
}
};
export default DataSource;
```
{% endcode %}
We are not going to create any additional files in our child theme. We wanted to change a single thing and we did it!
## Ensure all exports
Remember to re-export all of the initial file's exports, which you are not overriding. This way we ensure nothing will get lost after the modifications. This is done to the `SOME_VALUE` in the example above.
If you forget to re-export something, the application will lose any access to these values.
## Review project structure
See the full project structure below.
```bash
.
├── 📁 packages/
│ └── 📁 @example/
│ └── 📁 parent-theme/
│ ├── 📁 src/
│ │ ├── 📄 data-source.js
│ │ └── 📄 index.js
│ └── 📄 package.json
├── 📁 src/
│ └── 📄 data-source.js
└── 📄 package.json
```
## Demonstration
Let's now see what happens when we run the project. We are going to see the logging from the `run` method, which was kept intact. But the value of this logging is absolutely different!
```bash
['Data from the override']
```
As you see, during the project build resolution of all of the files fell back to the parent theme, except one file we have overridden. Our override changed the part of functionality we were willing to change and now the theme works differently.
How cool is that! Find out more in the guide above.
{% content-ref url="/pages/-MXlBPSFH8ruPNSxxpzy" %}
[File shadowing](/themes/parent-themes)
{% endcontent-ref %}
# Mosaic + React
Mosaic is great in conjunction with React! Learn to use it in this guide.
## Before we start
This tutorial will guide you through the first steps of using Mosaic in conjunction with React.
If something goes wrong and you are blocked somewhere - feel welcome to check out [the result](https://github.com/tilework/mosaic-tutorials/tree/master/mosaic-react) of this tutorial, we uploaded it to GitHub for you 👍🏻
## Create a project
First of all, let's create a simple React project. We are going to use the most common way to do that. See the command below!
```
npx create-react-app mosaic-101
```
Now let's run the project to make sure we see the same thing.
## Install Mosaic
First of all, we are going to install the `scripts` package and the `mosaic` itself.
{% tabs %}
{% tab title="yarn" %}
```javascript
yarn add @tilework/mosaic-cra-scripts @tilework/mosaic
```
{% endtab %}
{% tab title="npm" %}
```
npm i @tilework/mosaic-cra-scripts @tilework/mosaic
```
{% endtab %}
{% endtabs %}
Then, we replace the `react-scripts` with the `cra-scripts`, which come from the `@tilework/mosaic-cra-scripts` package.
{% code title="package.json" %}
```javascript
{
"scripts": {
"start": "cra-scripts start",
"build": "cra-scripts build",
"link": "cra-scripts link",
"test": "cra-scripts test"
}
}
```
{% endcode %}
## Launch the project
When you launch the project after the modifications above, you should receive the same result as in the first launch - unchanged.
## Prepare source code
In order to use the plugin system and create some plugins for the existing logic, we should put some namespaces into the source code. Let's start with modifying the `App` component and putting a namespace on that!
{% code title="src/App.js" %}
```javascript
/** @namespace App/App */
function App() {
...
```
{% endcode %}
## Create an extension
Local extensions, conventionally, are stored in a `packages` directory in the project root. So let's create this directory and initialize an npm module within it!
```bash
.
├── 📁 packages/
│ └── 📁 sample-extension/
│ └── 📄 package.json
├── 📁 src/
│ ├── ...
│ └── 📄 App.js
└── 📄 package.json
```
## Install and enable the extension
First, we need to install the extension. For the local extensions, we need to add it to the dependencies block manually, as follows. Also, we add the `postinstall` and `postupdate` scripts in order for the local package to be symlinked into `node_modules` directory on any interactions with the dependencies.
{% code title="package.json" %}
```javascript
{
"dependencies": {
"sample-extension": "file:./packages/sample-extension"
},
"scripts": {
"postinstall": "cra-scripts link",
"postupdate": "cra-scripts link"
}
}
```
{% endcode %}
In order to enable the extension, we should declare this in the package.json file of one of the enabled extensions or themes. For now, the only enabled Mosaic module in the application is our application, hence we are going to declare this in our main `package.json` file.
{% code title="package.json" %}
```javascript
{
"mosaic": {
"extensions": {
"sample-extension": true
}
}
}
```
{% endcode %}
Afterwards, run the dependency installation in your main package in order to trigger the `postinstall` script and link the extension.
{% tabs %}
{% tab title="yarn" %}
```javascript
yarn
```
{% endtab %}
{% tab title="npm" %}
```javascript
npm i
```
{% endtab %}
{% endtabs %}
## Declare a plugin
Inside of the extension we created, let's declare a plugin to modify the App component. The name file which the plugin is located in should end with `.plugin.js` and the file itself should export a configuration object.
For now, let's keep the logic intact, but log a message about the plugin being functional.
{% code title="packages/sample-extension/src/plugin/App.plugin.js" %}
```javascript
const plugin = (args, callback) => {
console.log('The plugin works!');
return callback(...args);
};
export default {
'App/App': {
function: plugin
}
};
```
{% endcode %}
In order for the application to get the new plugin file, restart the application. It is very important! Then, you will see our message in the console on the main page!

## Add an element to the page
Let's modify the previously created plugin declaration file in order to append an element to the page. And, let's remove the `console.log`, we don't need it anymore.
```jsx
const plugin = (args, callback) => {
return (
<>
{callback(...args)}
I bring the message from the plugin!
);
};
```
After declaring this, we are going to see our additional paragraph rendered on the page.

## Refactor thinking about SRP
In order for the application to be properly extensible, the logic within it should be granular. Modifying React trees after creation is considered a bad practice, we are going to use a different approach.
We are going to refactor the App component, in order for some additional contents to be able to be added to it without any additional effort. To do that, we'll separate the part which renders header's items from the other logic, so that we can append items there, instead of appending items to the app component itself!
```jsx
/** @namespace App/renderHeaderContents */
function renderHeaderContents() {
return (
<>

Edit src/App.js and save to reload.
Learn React
)
}
/** @namespace App/App */
function App() {
return (
);
}
```
After this, let's change the previously created plugin declaration file to add an item to the `header`, not below the `App` component.
```jsx
export default {
'App/renderHeaderContents': {
function: plugin
}
};
```
## Enjoy the results
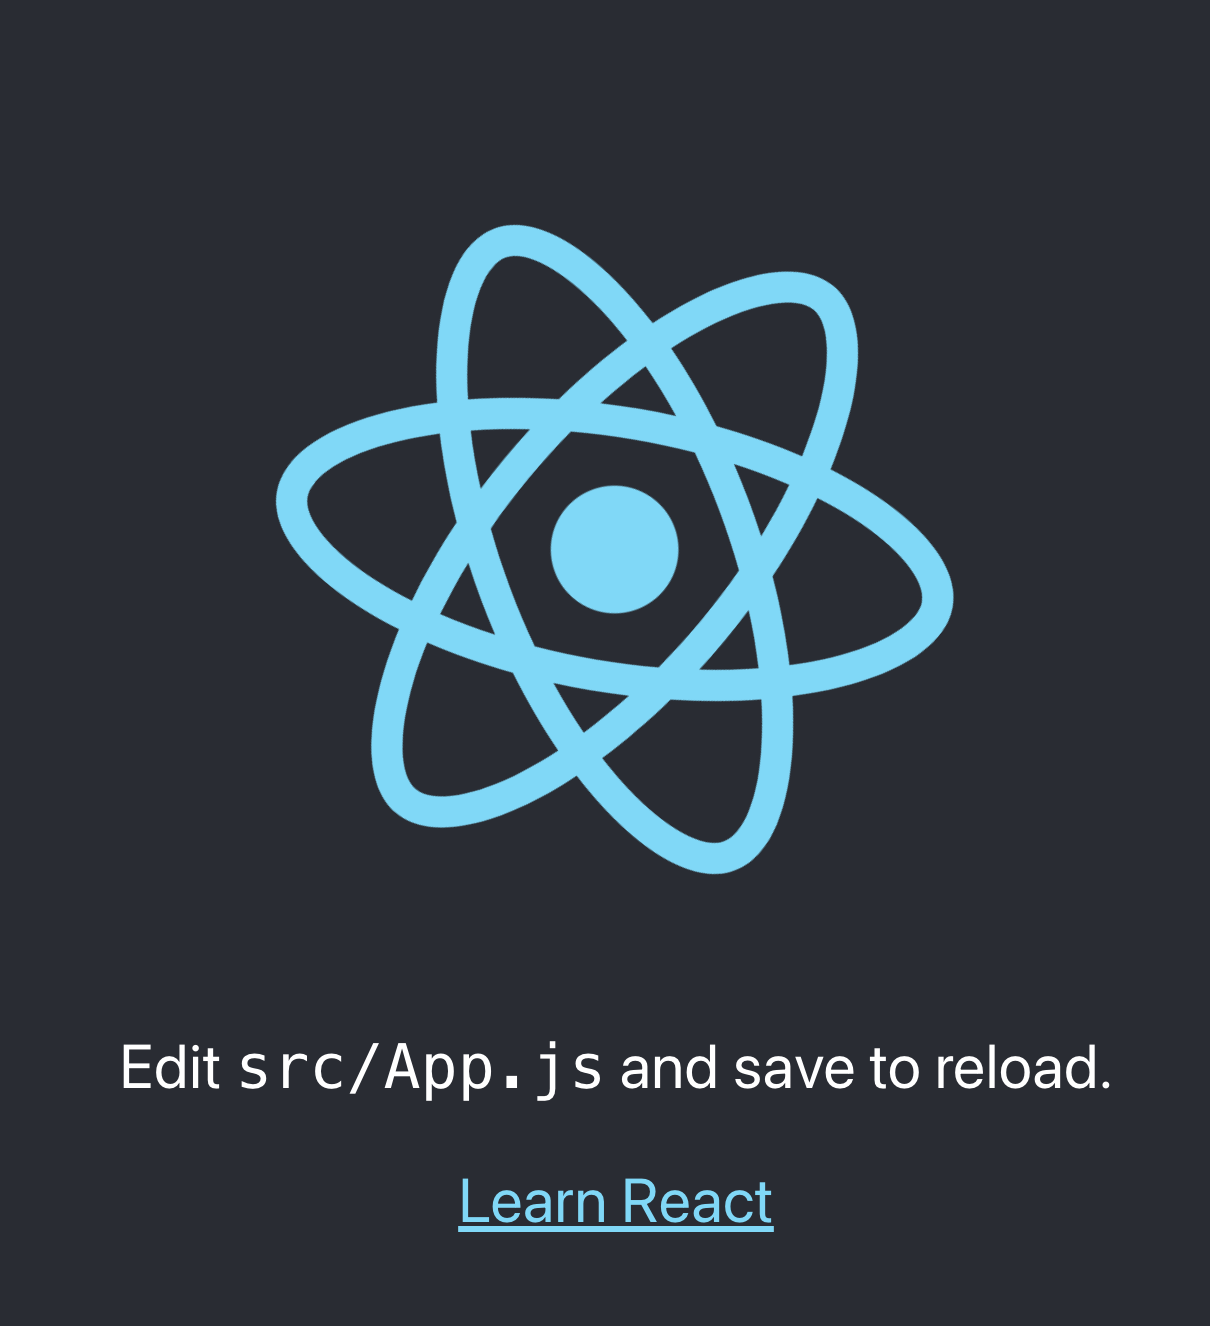
After all of the actions above are complete, you are going to see this result. The additional element will be appended right to the middle of the page!

# Mosaic + Webpack
## Before we start
This tutorial will guide you through the first steps of using Mosaic in project built with Webpack.
If something goes wrong and you are blocked somewhere - feel welcome to check out [the result](https://github.com/tilework/mosaic-tutorials/tree/master/mosaic-webpack) of this tutorial, we uploaded it to GitHub for you 👍🏻
## Create and configure a project
First of all, let's create a simple project. We are going to install the following dependencies there.
{% tabs %}
{% tab title="yarn" %}
```
yarn add -D webpack webpack-cli
yarn add @tilework/mosaic-config-injectors @tilework/mosaic-node-scripts @tilework/mosaic
```
{% endtab %}
{% tab title="npm" %}
```
npm i --save-dev webpack
npm i @tilework/mosaic-config-injectors @tilework/mosaic
```
{% endtab %}
{% endtabs %}
Then, let's configure Webpack! The configuration below says that the entry point is going to be `src/index.js` and some other build process details.
```javascript
const webpack = require('webpack');
const path = require('path');
const ConfigInjectors = require('@tilework/mosaic-config-injectors');
const config = ConfigInjectors.injectWebpackConfig({
entry: './src/index.js',
devtool: 'source-map',
output: {
path: path.resolve(__dirname, 'dist'),
filename: 'bundle.js'
},
context: __dirname
}, {
webpack
});
module.exports = config;
```
Also, let's provide a script for rebuilding and running the project in the package.json. We are going to start the project later on by running these scripts consequently.
```javascript
{
"scripts": {
"build": "webpack",
"start": "node dist/bundle.js"
}
}
```
## Implement some logic
We are going to need some source logic to interact with. Let's write it! Note that we need to put a namespace on the `getData` function in order to make it available to the plugin system.
{% code title="src/index.js" %}
```javascript
/** @namespace App/getData */
const getData = () => {
return ['Souce data'];
};
console.log(getData());
```
{% endcode %}
The logic above is going to produce the following output upon being ran.

## Create an extension
Local extensions, conventionally, are stored in a `packages` directory in the project root. So let's create this directory and initialize an npm module within it!
```bash
.
├── 📁 packages/
│ └── 📁 example-extension/
│ └── 📄 package.json
├── 📁 src/
│ └── 📄 index.js
└── 📄 package.json
```
## Install and enable the extension
First, we need to install the extension. For the local extensions, we need to add it to the dependencies block manually, as follows. Also, we add the `postinstall` and `postupdate` scripts in order for the local package to be symlinked into `node_modules` directory on any interactions with the dependencies.
{% code title="package.json" %}
```javascript
{
"dependencies": {
"example-extension": "file:./packages/example-extension"
},
"scripts": {
"postinstall": "node-scripts link",
"postupdate": "node-scripts link"
}
}
```
{% endcode %}
In order to enable the extension, we should declare this in the package.json file of one of the enabled extensions or themes. For now, the only enabled Mosaic module in the application is our application, hence we are going to declare this in our main `package.json` file.
{% code title="package.json" %}
```javascript
{
"mosaic": {
"extensions": {
"example-extension": true
}
}
}
```
{% endcode %}
Afterwards, run the dependency installation in your main package in order to trigger the `postinstall` script and link the extension.
{% tabs %}
{% tab title="yarn" %}
```javascript
yarn
```
{% endtab %}
{% tab title="npm" %}
```javascript
npm i
```
{% endtab %}
{% endtabs %}
## Declare a plugin
Inside of the extension we created, let's declare a plugin to modify the App component. The name file which the plugin is located in should end with `.plugin.js` and the file itself should export a configuration object.
For now, let's keep the logic intact, but log a message about the plugin being functional.
{% code title="packages/sample-extension/src/plugin/App.plugin.js" %}
```javascript
const plugin = (args, callback) => {
console.log('The plugin works!');
return callback(...args);
};
export default {
'App/getData': {
function: plugin
}
};
```
{% endcode %}
Let's see what our application does when we build and launch it now!

## Modify the logic
Now, let's actually do something that could be useful in a real-life situation. Let's provide some additional data with our plugin system! Here, we have a simplistic example, but in some real-life project we can add a route to a router or a context provider to some context providers' list. Anything you want! The algorithm will remain the same.
Let's modify the plugin declaration created above in order to achieve that!
```javascript
const plugin = (args, callback) => {
const originalData = callback(...args);
const additionalData = [
'Additional data'
];
console.log({ originalData });
return [
...originalData,
...additionalData
];
};
```
## Enjoy the results
When we launch the project now, we see the following. Great, isn't it?

# Install a local extension
Follow these steps in order to install an extension from a local source
First of all, download the extension
Create a `packages/` directory inside of your theme's root.
{% hint style="info" %}
Conventionally, the directory to store packages is called `packages`, but you may use another name if you are willing to.
{% endhint %}
Put the extension into the `packages/` directory. Make sure that you have a `packages//package.json` file present alongside all the other extension's contents, that means that you have unpacked the extension correctly.
```bash
.
├── 📁 packages/
│ ├── 📁 @somebody/ # All extensions of this scope will be in this dir
│ │ └── 📁 extension1/ # This extension is a scoped package
│ │ ├── ...
│ │ └── package.json
│ └── 📁 extension2/ # This extension is not a scoped package
│ ├── ...
│ └── package.json
├── 📁 src
└── package.json
```
Add the following scripts to the `scripts` section of your theme's `package.json` file. This is necessary for your package to be automatically symlinked into the `node_modules` directory of your theme, each time after any manipulation with dependencies
{% tabs %}
{% tab title="nextjs-scripts" %}
```javascript
{
"scripts": {
"postinstall": "nextjs-scripts link",
"postupdate": "nextjs-scripts link"
}
}
```
{% endtab %}
{% tab title="cra-scripts" %}
```javascript
{
"scripts": {
"postinstall": "cra-scripts link",
"postupdate": "cra-scripts link"
}
}
```
{% endtab %}
{% tab title="node-scripts" %}
```javascript
{
"scripts": {
"postinstall": "node-scripts link",
"postupdate": "node-scripts link"
}
}
```
{% endtab %}
{% endtabs %}
Add the extension to the **dependencies** of your theme, as follows:
{% code title="./package.json" %}
```javascript
{
"dependencies": {
"@somebody/extension1": "file:./packages/@somebody/extension1".
"extension2": "file:./packages/extension2".
}
}
```
{% endcode %}
[Enable](/install-an-extension/enable-or-disable-an-extension) the extension:
{% code title="package.json" %}
```javascript
{
"mosaic": {
"extensions": {
"@somebody/extension1": true,
"extension2": false
}
}
}
```
{% endcode %}
Update the symlinks by running the following command
{% tabs %}
{% tab title="npm" %}
```bash
npm run postinstall
```
{% endtab %}
{% tab title="yarn" %}
```bash
yarn postinstall
```
{% endtab %}
{% endtabs %}
# Install with a package manager
Mosaic extensions can be installed via supported package managers.
The installation process of published to public registries extensions is pretty straightforward. Install the extension as a regular package with your favorite **supported** package manager.
Currently, **yarn and npm** are supported. PNPM is not.
Afterwards, [enable the extension](/install-an-extension/enable-or-disable-an-extension).
# Enable or disable an extension
An ability to control which extensions are active in your application, and which are not
## Registering an extension
**Both themes and extensions can register extensions**. In order to do it, the extension should be added to `mosaic.extensions` object of `package.json` . The extension must be a valid NPM package, therefore you are required to add it into `dependencies` field of your `package.json`.
Enabling and disabling an extension is achieved by setting the `true`or `false` as a value of the extension's key in `mosaic.extensions` .
Your theme can also control enabled extensions across the whole application. This allows to disable the previously enabled extension. The sequence of preference in this case is:
1. Your theme's enabled extensions
2. Your theme's parent themes' enabled extensions
3. Extensions' enabled extensions
{% code title="./package.json" %}
```javascript
{
"dependencies": {
"@example/enabled-package": "0.0.1",
"@example/disabled-package": "file:./packages/@example/disabled-package"
}
"mosaic": {
"extensions": {
"@example/enabled-package": true,
"@example/disabled-package": false
}
}
}
```
{% endcode %}
{% hint style="danger" %}
### Watch out!
Disabling a previously enabled extension can lead to layout-shifts and issues inside of your parent theme. Also, there might be extensions plugging into the extension you intend to disable, this can lead to unexpected results.
{% endhint %}
# Anatomy of an extension
Get acknowledged with some rules which apply to any extension
## Package.json
For NPM package to be considered an [extension](broken://pages/-MZIMMdiBcQjgReqHOyM#what), it must have a `package.json` field `mosaic.type` equal to `extension`.
It is important for Mosaic module to be recognized in order for [namespaces](/develop-an-extension/namespaces) to work properly (get transpiled into logic).
```javascript
{
"mosaic": {
"type": "extension"
}
...
}
```
## File structure
Mosaic has a minimal requirement towards the folder structure of a module.
All of the `.plugin.js` files ([plugin declaration files](/develop-an-extension/anatomy-of-an-extension#plugin-declaration-files)) should be located under the `src/plugin` directory. All the subdirectories of this one are scanned for them, but no other places.
It's recommended to split all of your other logic into separate directories of the `src` directory. All of the functionality outside of `src` will not be available for [shadowing](/themes/parent-themes).
```bash
├── 📁 node_modules
├── 📄 package.json
└── 📁 src
├── ... # Any own logic of your extension here
└── 📁 plugin # Plugging logic here!
├── 📄 some.plugin.js
└── 📄 other.plugin.ts
```
# Namespaces
The main concept you need to know in order to develop a plugin and a plugin-friendly application
## What is this
**Namespace** marks a place that is available for the plugin system, and hence can be modified by plugins. In Mosaic-friendly application, it is advised to have as many namespaces as possible.
This directive accepts a **string** value, as shown below (as opposed to directives which accept object parts).
{% tabs %}
{% tab title="class" %}
```javascript
/** @namespace Some/Namespace/Here */
class A {
...
}
```
{% endtab %}
{% tab title="function" %}
```javascript
/** @namespace Some/Namespace/Here */
function some() {
...
}
```
{% endtab %}
{% tab title="arrow" %}
```javascript
/** @namespace Some/Namespace/Here */
const some = () => {
...
}
fetch(something).then(
/** @namespace Some/Other/Namespace */
(data) => ...
);
```
{% endtab %}
{% tab title="export" %}
```javascript
/** @namespace Some/Namespace/Here */
export const some = () => {
...
}
/** @namespace Some/Other/Here */
export class Other {
...
}
/** @namespace Some/Other/More */
export default class OneMore {
...
}
```
{% endtab %}
{% endtabs %}
Mosaic started in [ScandiPWA](https://github.com/scandipwa/scandipwa) - extensible React storefront. As you can see, **each** and every class and function throughout the application **has a namespace** and hence is absolutely **plugin-friendly**.
Plugins use namespaces to **intercept** operations with things the namespaces belong to.
## How does it work
For namespace comments to work, Mosaic requires `babel-plugin-mosaic-middleware-decorator` plugin. It can be found [here](https://github.com/tilework/mosaic/tree/master/core/babel-plugin-mosaic-middleware-decorator). This plugin processes the code during the build and transforms the logic as seen below.
{% hint style="warning" %}
If you don't use the Babel plugin mentioned above - the namespace comments will not work properly. Be aware of that - if you are willing to use Typescript, you will need to migrate build process to [Webpack + Babel](/getting-started/webpack) stack (or [Create React App](/getting-started/create-react-app)).
All of the instructions in the Getting Started guides handle this for you.
{% endhint %}
{% tabs %}
{% tab title="Before" %}
```javascript
/** @namespace Some/Namespace */
class SomeClass extends SomeParent {
...
}
```
{% endtab %}
{% tab title="After" %}
```javascript
/** #namespace Some/Namespace */
const SomeClass = Mosaic.middleware(
class SomeClass extends Mosaic.Extensible(SomeParent) {
...
},
'Some/Namespace'
);
```
{% endtab %}
{% endtabs %}
Hence, it is possible to use Mosaic without Babel, but strongly not recommended.
{% hint style="info" %}
Any package containing`@namespace` magic comments **must** have a `mosaic` block declared in its package.json file. Otherwise,`@namespace` magic comments will not be handled correctly during the build time, hence will not work.
{% endhint %}
##
# Runtime plugins
Modify source logic without rewriting the source code!
**Mosaic** introduces the concept of "plugins". This is a feature of [**extensions**](https://github.com/tilework/docs/tree/8e55fec3b15347bf6ef4b877289277dce07cccb5/extensions/extensions.md).
**A plugin** is a **proxy** between the original function (or object) and the function caller (object user). A plugin intercepts invocation of the original function and **has control** over the arguments and retrieved return value
## Plugin declaration files
Also conventionally called ".plugin.js" files, are the most important part of any **extension**. Because that's where the **plugging logic is declared**!
An instruction to the plugin system in pseudocode looks as follows.
{% tabs %}
{% tab title="Pseudocode" %}
```javascript
Dear Plugin System,
intercept member of kind KIND
with name MEMBERNAME
of namespace NAMESPACE
instead of it, provide P(..., Y.X, ...) to the application
```
{% endtab %}
{% tab title="JavaScript" %}
```javascript
const P = (...) => { ... }
export default {
'NAMESPACE': {
'KIND': {
'MEMBERNAME': P
}
}
}
```
{% endtab %}
{% endtabs %}
In order to make this code actually do something in your application, you will need to change [KIND](/develop-an-extension/plugins#determine-target-kind), [NAMESPACE](/develop-an-extension/plugins#determine-target-namespace) and [MEMBERNAME](/develop-an-extension/plugins#member-name) to values relevant for your application. The process of getting these values is described below in this guide.
## Preparations
In order to **declare a plugin**, some preparations are necessary. First of all, an [extension module](broken://pages/-MZIMMdiBcQjgReqHOyM) must be [created](/develop-an-extension/anatomy-of-an-extension). You will implement your plugin there.
For the development purposes, it's recommended to have the under-development extension module [installed](/install-an-extension/use-a-local-extension) into your project.
Then, you should create a plugin declaration file in the [proper place](/develop-an-extension/anatomy-of-an-extension#file-structure). The guide below describes the process of implementing logic in this plugin declaration file.
## Select a target
### Target namespace
**Each** plugin has a **target** to "plug into". This target is determined by a [namespace](/develop-an-extension/namespaces#namespace)**.** Namespace should be present in the your source, which you are willing to change. If your source lacks such a namespace - put it there!
If you are willing to create
{% hint style="info" %}
Remember to have the source module [properly configured](/develop-an-extension/namespaces#how-namespace-comments-work) in order for namespace comments to be handled correctly by our [transformation](/develop-an-extension/namespaces#how-namespace-comments-work)
{% endhint %}
### Target kind
Plugin system should know the kind of the piece of functionality you are trying to interact with. There are several such kinds.
Currently, the following targets are available for modifications through the plugin system:
* **function** - for functions declared both via regular and arrow syntax, not belonging to any class
* **member-function** - for functions declared either as regular ES6 class members or as class properties (arrow functions)
* **member-property** - for class members declared via class property syntax (*but not for functions!*)
* **static-member** - for any kind of static members
### Member name
For every target kind apart from **function**, it is necessary to determine the name of the member you are willing to interact with. All of these target kinds are related to **classes**, and the names of their members will be taken for this purpose.
{% hint style="info" %}
Due to the **function** being the only member of its namespace, it has a reduced configuration section and does not require a member name (see in examples)
{% endhint %}
## Implement proxy function
Each [target kind](/develop-an-extension/plugins#determine-target-kind) expects a function with a different set of arguments. Below is an overview of function implementations for each proxy type. Each of these **plugins** solely invokes the original functionality, thus leaving the application intact.
Such a proxy function has full control over the call of the target that you are plugging into. Hence, you can modify arguments passed to it, modify the return value, decide on whether to call the original member or not (you usually are **required** to, see a warning below)
{% hint style="info" %}
The `callback` functions seen below are bound to the initial contexts automatically.
{% endhint %}
{% tabs %}
{% tab title="function" %}
* An array of **`args`** from the caller
* **`callback`** - the original function (or the next plugin)
* **`context`** - the original context of a function
```javascript
const plugin0 = (args, callback, context) => {
return callback(...args);
}
```
{% endtab %}
{% tab title="member-function" %}
* An array of **`args`** from the caller
* **`callback`** - the original method (or the next plugin)
* **`instance`** - the original class instance, `this` of the invokable member
```javascript
const plugin1 = (args, callback, instance) => {
return callback(...args);
}
```
{% endtab %}
{% tab title="member-property" %}
* **`member`** - the original value of the property
* **`instance`** - the original class instance, `this` of the invokable member
```javascript
const plugin2 = (member, instance) => {
return member;
}
```
{% endtab %}
{% tab title="static-member" %}
* An array of **`arguments`** from the caller
* **`callback`** - the original method (or the next plugin)
* **`Class`** - the original class, `this` of the invokable member
```javascript
const plugin3 = (args, callback, Class) => {
return callback(...args);
}
```
{% endtab %}
{% endtabs %}
{% hint style="danger" %}
**Not** **calling** the `callback` will **prevent** the initial logic from being called, thus overwriting it completely. Such an action makes your plugin much **less compatible** with any other plugins.
This is **not recommended**, but if critically necessary - do this only **acknowledgedly** and on your own risk.
{% endhint %}
## Configure the plugin
In order for a plugin declaration file to have impact on the application, it should export a piece of configuration that will be consumed by the plugin system. See the structure of such a configuration in the example below.
Note, that the variables called `pluginX` are proxy functions [described above](/develop-an-extension/plugins#implement-proxy-function).
{% tabs %}
{% tab title="Initial functionality" %}
```javascript
/** @namespace Namespace/Of/Some/Function */
const fn = () => { ... }
/** @namespace Namespace/Of/Some/Class */
class SomeClass {
propertyName = { ... }
functionName() { ... }
static staticName() { ... }
}
```
{% endtab %}
{% tab title="Plugins: concise" %}
```javascript
export default {
'Namespace/Of/Some/Function': {
'function': plugin0
},
'Namespace/Of/Some/Class': {
'member-function': {
functionName: plugin1
},
'member-property': {
propertyName: plugin2
},
'static-member': {
staticName: plugin3
}
}
};
```
{% endtab %}
{% tab title="Plugins: granular" %}
```javascript
export default {
'Namespace/Of/Something': {
'function': {
position: 100,
implementation: plugin0
}
}
};
```
{% endtab %}
{% endtabs %}
{% hint style="info" %}
You can create class members that do not exist in the original classes. It is useful when you need some life-cycle member functions that are not present in the original class.
{% endhint %}
# Build configuration plugins
Modify build configurations without rewriting them!
**Mosaic** provides an opportunity to modify **Webpack** and **Babel** configurations of a project from an isolated module, similarly to the [runtime plugins](/develop-an-extension/plugins), but not quite.
{% hint style="info" %}
In CRA setups, CRACO plugin API is available instead of this one.
{% endhint %}
## Preparations
In order to **declare a build configuration plugin**, some preparations are necessary. First of all, an [extension module](/develop-an-extension/anatomy-of-an-extension) must be [created](/develop-an-extension/anatomy-of-an-extension). You will implement your plugin there.
For the development purposes, it's recommended to have the under-development extension module [installed](/install-an-extension/use-a-local-extension) into your project.
## Declare a build configuration plugin
Then, in your module, you should create a **build configuration plugin** declaration file, and reference it from your **package.json**. It is commonly accepted to create such plugins in `build-config` directory in the root of your module.
Any module can have **unlimited** amount of such plugins. If the module is **enabled**, or used as a **parent** theme - its build configuration plugins will be **present** in the application.
```javascript
{
"mosaic": {
"build": {
"plugins": ["./build-config/plugin-file.js"]
}
}
}
```
The guide below describes the process of implementing logic in this plugin declaration file.
## Modify the configurations
A build configuration plugin declaration file is a [CJS module](https://dev.to/iggredible/what-the-heck-are-cjs-amd-umd-and-esm-ikm), which exports a single object with `plugin` property.
This plugin property defines at least one of the two fields visible below.
Each field provides a **function**, which accepts a **Webpack** or **Babel** configuration object (correspondingly). This function processes the configuration object and **returns** a new value, used as a corresponding configuration further in the application. It is commonly accepted to mutate the configuration within these functions.
```javascript
module.exports = {
plugin: {
overrideWebpackConfig: (webpackConfig) => {
// TODO modify webpack config
return webpackConfig;
},
overrideBabelConfig: (babelConfig) => {
// TODO modify babel config
return babelConfig;
}
}
};
```
{% hint style="warning" %}
Despite the resemblance with [CRACO plugins](https://github.com/gsoft-inc/craco/blob/master/packages/craco/README.md#develop-a-plugin), this API is not related to CRACO.
{% endhint %}
# CRACO plugins
**Mosaic** provides an opportunity to modify **Webpack** and **Babel** configurations of a project from an isolated module, similarly to the [runtime plugins](/develop-an-extension/plugins), but not quite.
{% hint style="info" %}
In non-CRA setups, [Build Configuration Plugins](/develop-an-extension/build-configuration-plugins) are available instead of this API.
{% endhint %}
## Preparations
In order to **declare a build configuration plugin**, some preparations are necessary. First of all, an [extension module](/develop-an-extension/anatomy-of-an-extension) must be [created](/develop-an-extension/anatomy-of-an-extension). You will implement your plugin there.
For the development purposes, it's recommended to have the under-development extension module [installed](/install-an-extension/use-a-local-extension) into your project.
## Declare a build configuration plugin
Then, in your module, you should create a **build configuration plugin** declaration file, and reference it from your **package.json**. It is commonly accepted to create such plugins in `build-config` directory in the root of your module.
Any module can have **unlimited** amount of such plugins. If the module is **enabled**, or used as a **parent** theme - its build configuration plugins will be **present** in the application.
```javascript
{
"mosaic": {
"build": {
"cracoPlugins": ["./build-config/something.js"]
}
}
}
```
The guide below describes the process of implementing logic in this plugin declaration file.
## Write a build configuration plugin
A CRACO build configuration plugin looks something like this.
Notice that here you need to destructure the corresponding configurations from the first argument of the function you write, as shown below.
This approach supports CRACO plugin API completely, so [check out their docs](https://github.com/gsoft-inc/craco/blob/master/packages/craco/README.md#develop-a-plugin) to get the full info on this!
```javascript
module.exports = {
plugin: {
overrideCracoConfig: ({ cracoConfig, ... }) => { ... },
overrideWebpackConfig: ({ webpackConfig, ... }) => { ... },
...
}
};
```
# Styles
Mosaic changes Next.js framework's style-related behaviour
Next.js comes with [certain limitations](https://nextjs.org/docs/basic-features/built-in-css-support) on style files. Mosaic removes some of these limitations (they contradict Mosaic's principles) in order to provide a better development experience for Mosaic users.
See a list of changes below:
1. Global CSS is allowed, and not only in the App component
# Pages
Declare a Next.js page in your Mosaic module
## Motivation
**Next.js** **has a limitation** on the project structure - all of the pages should be located in the `pages` directory. **Mosaic** **removes this limitation**, thus allowing for a modular project structure. Each Mosaic module is able to **register** its own **pages**, which will be taken into account during the build time.
## Preparations
In order to **declare a Next.js page**, some preparations are necessary. This will work only in Next.js powered by Mosaic, launched with package `@tilework/mosaic-nextjs-scripts`
First of all, an [extension module](broken://pages/-MZIMMdiBcQjgReqHOyM) must be [created](/develop-an-extension/anatomy-of-an-extension). You will implement your page there.
For the development purposes, it's recommended to have the under-development extension module [installed](/install-an-extension/use-a-local-extension) into your project.
## Page type
The following page types are available:
* [SSR](https://nextjs.org/docs/basic-features/pages#server-side-rendering): server
* [Static Generation without data](https://nextjs.org/docs/basic-features/pages#static-generation-without-data): static-no-data
* [Static Generation with data](https://nextjs.org/docs/basic-features/pages#static-generation-with-data): static-with-data
## Register a page
In order to have an additional page in a Mosaic-powered Next.js application, the first step is to register this page in order to let the Mosaic build system know about the page. It should be done in the following way.
Instead of the `server` you may use one of the [values](/next.js-features/pages#page-type) described above.
{% code title="@example/page-module/package.json" %}
```javascript
{
"mosaic": {
"nextPages": {
"pagename": "server"
}
}
}
```
{% endcode %}
## See the magic
A template page, similar to the following, will be generated after the actions above. For different page types, different templates will be generated. This will cause additional [namespaces](/develop-an-extension/namespaces) to be available for [plugins](/develop-an-extension/plugins).
Add functionality and contents to it with [plugins](/develop-an-extension/plugins)!
{% tabs %}
{% tab title="server" %}
```javascript
import renderEmptyPage from '@tilework/mosaic-nextjs-scripts/lib/empty-page';
/**
* ! This file is a "placeholder" / injection point generated,
* ! so that the NextJS static router (and Babel plugin) would
* ! recognize this file as a page. You can override this page
* ! behaviour using plugin system!
*/
/** @namespace Pages/pagename/Page */
const Page = () => (
process.env.NODE_ENV === 'production'
? null
: renderEmptyPage({ ... })
);
/** @namespace Pages/pagename/getServerSideProps */
const getServerSideProps = () => ({ props: {} });
export { getServerSideProps };
export default Page;
```
{% endtab %}
{% tab title="static-no-data" %}
```javascript
import renderEmptyPage from '@tilework/mosaic-nextjs-scripts/lib/empty-page';
/**
* ! This file is a "placeholder" / injection point generated,
* ! so that the NextJS static router (and Babel plugin) would
* ! recognize this file as a page. You can override this page
* ! behaviour using plugin system!
*/
/** @namespace Pages/pagename/Page */
const Page = () => (
process.env.NODE_ENV === 'production'
? null
: renderEmptyPage({ ... })
);
export default Page;
```
{% endtab %}
{% tab title="static-with-data" %}
```javascript
import renderEmptyPage from '@tilework/mosaic-nextjs-scripts/lib/empty-page';
/**
* ! This file is a "placeholder" / injection point generated,
* ! so that the NextJS static router (and Babel plugin) would
* ! recognize this file as a page. You can override this page
* ! behaviour using plugin system!
*/
/** @namespace Pages/pagename/Page */
const Page = () => (
process.env.NODE_ENV === 'production'
? null
: renderEmptyPage({ ... })
);
/** @namespace Pages/pagename/getStaticProps */
const getStaticProps = () => ({ props: {} });
export { getStaticProps };
export default Page;
```
{% endtab %}
{% endtabs %}
## Implement the page
The code example shown below explains, how to implement the page declared above. It uses our plugin system, if you are not yet familiar to it - get acknowledged in [this guide](/hands-on-guides/quick-start).
{% tabs %}
{% tab title="server" %}
```javascript
const serverSideProps = async ([context]) => ({
props: {
sample: 'example for a server-side prop'
}
});
const page = ([{ sample }]) => ;
export default {
'Pages/pagename/getServerSideProps': {
function: serverSideProps
},
'Pages/pagename/Page': {
function: page
}
}
```
{% endtab %}
{% endtabs %}
# Common props
Common props are props that are available for each `Next` page that is server-side rendered via `getServerSideProps`.
## Motivation
We need to have access to some specific information on every page. `Next` offers its own way of handling common/global props via declaring an `_app.js` page. This method, however, comes with limitations and doesn't support `Next` data fetching methods like `getServerSideProps` and `getStaticProps`.
With the extensibility that is achieved in Mosaic, it's possible to declare a new namespace `Pages/getCommonServerSideProps` that will be the default output of each `getServerSideProps` function in the app.
## Extensibility
`Pages/getCommonServerSideProps` is a fixed namespace, meaning that any module can plug into it, make changes, and these changes will be reflected in all `Next` pages in the app. By default, each `Next` page are assigned these values:
```javascript
/** @namespace Pages/getCommonServerSideProps */
const getCommonServerSideProps = () => ({ props: {} });
/** @namespace <%= server_namespace %> */
const getServerSideProps = () => getCommonServerSideProps();
```
In order to add new common props, a plugin has to be created extending the `Page/getCommonServerSideProps` namespace. An example of adding a synchronous variable to the common props:
```javascript
const addStoreNameToCommonProps = async (args, callback) => {
const commonProps = await callback(...args);
return {
props: {
...commonProps.props,
storeName: 'My awesome store'
}
};
};
export default {
'Pages/getCommonServerSideProps': {
function: addStoreNameToCommonProps
}
};
```
Note one important thing in the code above, **the callback output is awaited for**. This is important to keep in mind, as common props could also contain asynchronous variables:
```javascript
const addPaymentProvidersToCommonProps = async (args, callback) => {
const commonProps = await callback(...args);
const paymentProviders = await requestPaymentProviders();
return {
props: {
...commonProps.props,
paymentProviders
}
};
};
export default {
'Pages/getCommonServerSideProps': {
function: addPaymentProvidersToCommonProps
}
};
```
{% hint style="warning" %}
Always make sure to always use `await` before `callback(...args)`!
{% endhint %}
## Usage
As mentioned above, the `getServerSideProps` function for each `Next` page will return the common props by default. This is an example of combining the common props with page-specific props:
```javascript
const getServerSideProps = async (args, callback) => {
const commonProps = await callback(...args);
const pageProps = await requestPageProps();
return {
props: {
...commonProps.props,
...pageProps
}
};
};
export default {
'Pages/my-page/getServerSideProps': {
function: getServerSideProps
}
};
```
Very few pages, if any, are going to use all of the common props. Due to that, it's recommended to extract the specific common props that the page uses and ignore the rest. Let's adjust the code to only retrieve `storeName` from the common props:
```javascript
const getServerSideProps = async (args, callback) => {
const { props: { storeName } } = await callback(...args);
const pageProps = await requestPageProps();
return {
props: {
...pageProps,
storeName
}
};
};
export default {
'Pages/my-page/getServerSideProps': {
function: getServerSideProps
}
};
```
This way if new entries are added to the common props, they won't be sent to props of that page automatically. This also prevents potential overrides if the name of a common props matches the name of a page prop.
## Working with common props
Before starting to add variables to common props, it's crucial to understand the purpose of such solution.
{% hint style="warning" %}
Common props are **render-blocking**. This means that unless **ALL** API requests within the common props are either resolved or rejected, the page will not load. Be careful with 3rd-party APIs and always specify a timeout to all requests, just in case!
{% endhint %}
Common props **are**:
* A convenient way of delcaring **static** data accross pages,
* Great for making API requests that are made on each page such as configuration fetching.
Common props are **not**:
* A Redux store. Data flows in one way - from the `getCommonServerSideProps` to a page - there are no actions to modify the common props from a page,
* Designed to store any dynamic data. These props are fetched once during the server-side rendering and won't react to any further changes.
# Router
Reviewing a React router component implemented with Mosaic for Mosaic
In any frontend or backend application, the router is a place which is one of the most important ones to make plugin-friendly, when using Mosaic. Any amount of routes can be added to it, if it is designed correctly.
This article will demonstrate a router design from [@scandipwa/shopify](https://github.com/scandipwa/shopify) project, which is written completely in Mosaic.
## Source implementation
Let's see the router itself! It is also available on [this link](https://github.com/scandipwa/shopify/blob/master/packages/router/src/component/Router/Router.component.js). This is exactly the form of the router at the moment of writing this article.
It is clearly visible that the router does not actually render any routes! It just provides several convenient points for modification with Mosaic [runtime plugins](/develop-an-extension/plugins): `_beforeSwitchRenderList`, `_switchRenderList` and `_afterSwitchRenderList`
```javascript
import { createSortedRenderMap } from '@scandipwa/framework/src/util/SortedMap';
import { createBrowserHistory } from 'history';
import { PureComponent } from 'react';
import { Router as ReactRouter } from 'react-router';
import { Switch } from 'react-router-dom';
export const history = createBrowserHistory({ basename: '/' });
/** @namespace Router/Component/Router/Component/RouterComponent */
export class RouterComponent extends PureComponent {
static propTypes = {};
_beforeSwitchRenderList = createSortedRenderMap({});
_switchRenderList = createSortedRenderMap({});
_afterSwitchRenderList = createSortedRenderMap({});
contentRenderList = createSortedRenderMap({
routerBeforeSwitch: this._beforeSwitchRenderList.render,
routerRenderSwitch: this.renderSwitch.bind(this),
routerAfterSwitch: this._afterSwitchRenderList.render
});
renderSwitch() {
return (
{ this._switchRenderList.render() }
);
}
renderRouterContent() {
return this.contentRenderList.render();
}
render() {
return (
{ this.renderRouterContent() }
);
}
}
export default RouterComponent;
```
## Filling such a router by using plugins
A router is pointless without routes, right? So let's add a route to the one defined above! We will use the [Mosaic runtime plugins](/develop-an-extension/plugins) for this purpose.
As you see, the plugin declaration file presented below modifies the [namespace](/develop-an-extension/plugins#target-namespace) of the class above, a member called `_switchRenderList` of [target kind](/develop-an-extension/plugins#target-kind) `member-property`
It implements a [plugin (proxy) function](/develop-an-extension/plugins#implement-proxy-function) `addCartPage`, which accepts the initial member - sorted render map `_switchRenderList` declared above, adds an additional item to that map and returns the modified value to the application.
```javascript
/* eslint-disable @scandipwa/scandipwa-guidelines/jsx-no-props-destruction */
import { createElement, lazy, Suspense } from 'react';
import { Route } from 'react-router';
import CartFallbackPage from '../component/CartFallbackPage';
const CartPage = lazy(() => import('../component/CartPage'));
const addCartPage = (member) => {
const CART_PAGE_POSITION = 1000;
member.addItem(
() => createElement(Route, {
path: '/cart',
exact: true,
render: (props) => (
}>
)
}),
'routerCartPage',
CART_PAGE_POSITION
);
return member;
};
export default {
'Router/Component/Router/Component/RouterComponent': {
'member-property': {
_switchRenderList: addCartPage
}
}
};
```
# Parent theme system
Mosaic introduces a concept of "themes"
## Create a parent theme
{% hint style="info" %}
**Theme** is a collection of components, which implements a presentation layer that is unique to your application. It should not contain any business logic. It should simply adopt extensions functionality to intended design of your application.
{% endhint %}
For application to be considered a theme, it must have a `package.json` field `mosaic.type` equal to `theme`
{% code title="package.json" %}
```javascript
{
"mosaic": {
"type": "theme",
"themeAlias": "Parent"
}
}
```
{% endcode %}
## Use a parent theme
Themes can stack on top of each other. A theme, which another theme is based on, is called a **parent theme**.
To specify a parent theme, set the `package.json` field `mosaic.parentTheme` equal to intended parent theme's package name.
{% hint style="warning" %}
If you are selecting a new parent theme, it is not enough to just set the value of `mosaic.parentTheme`in `package.json`. The parent theme package should be listed among of your package's `dependencies`
{% endhint %}
The properly installed parent theme could look like this in `package.json`:
```javascript
{
"name": "@me/child-theme",
"dependencies": {
"@example/parent-theme": "1.0.1"
},
"mosaic": {
"type": "theme",
"parentTheme": "@example/parent-theme"
}
}
```
A theme can override files of a parent theme. Learn more about overriding a parent theme in the [File overrides](/themes/parent-themes#to-override-a-file-of-a-parent-theme) guide.
# File shadowing
Build projects on top of projects
Mosaic introduces the concept of shadowing (overriding) files. **Shadowing is a feature of** [**themes**](/themes/extensions-and-themes).
The shadowing mechanism **will only function** for files in the `src` and `public` directories your theme, parent theme or extensions.
## Shadow a parent theme
{% tabs %}
{% tab title="Instruction" %}
1. **Create** a child theme, set the `mosaic.parentTheme` value of its package.json to the proper parent theme. This parent theme should be [installed](/install-an-extension/use-a-local-extension) into your child theme.
2. **Determine** the file of the parent theme you are willing to shadow.
3. **Create** a file on the same path of the child theme.
4. [**Implement**](/hands-on-guides/quick-start-1#shadow) functions/classes/variables which are going to be provided to the application instead of the initial ones. You may or may not use the original functionality within these values.
5. [**Ensure**](/hands-on-guides/quick-start-1#ensure-all-exports) that all of the **exports** of the parent theme are also exported from this file.
{% endtab %}
{% tab title="Example" %}
1. **Have** a child theme created, `@example/parent-theme` is [installed](/install-an-extension/use-a-local-extension) into it and set as `mosaic.parentTheme` field in the `package.json`
2. **Select** file `@example/parent-theme/src/AddToCart.component.js`
3. **Create** file `src/AddToCart.component.js` in the child theme
4. [**Override**](/hands-on-guides/quick-start-1#shadow) its functionality
5. [**Ensure**](/hands-on-guides/quick-start-1#ensure-all-exports) re-exports from the child theme's file
{% endtab %}
{% endtabs %}
{% hint style="warning" %}
In case the `package.json`field`mosaic.parentTheme`is empty, your theme is considered to be a **root theme**. In this case, parent theme overrides will not function, as there is simply no parent theme.
{% endhint %}
## Shadow an extension
{% tabs %}
{% tab title="Instruction" %}
1. **Work** with a theme, in which some extension is installed
2. **Determine** the file of the extension you are willing to shadow.
3. **Create** a file on the path of the child theme that is build as follows: `src//` where \ is relative to the extension's `src` directory
4. [**Implement**](/hands-on-guides/quick-start-1#shadow) functions/classes/variables which are going to be provided to the application instead of the initial ones. You may or may not use the original functionality within these values.
5. [**Ensure**](/hands-on-guides/quick-start-1#ensure-all-exports) that all of the **exports** of the parent theme are also exported from this file.
{% endtab %}
{% tab title="Example" %}
1. **Have** a theme `my-theme` and an extension `@example/extension-1` installed into it
2. **Select** a file to override: `@example/extension-1/src/DataProvid`
3. **Create** a file on the following path: `my-theme/src/@example/extension-1/DataProvider.js`
4. [**Override**](/hands-on-guides/quick-start-1#shadow) its functionality
5. [**Ensure**](/hands-on-guides/quick-start-1#ensure-all-exports) re-exports from the child theme's file
{% endtab %}
{% endtabs %}
{% hint style="warning" %}
### **Caveat**
If the file you created will **unintentionally match** extension's or parent theme's path, it will override it. Be careful not to break the functionality, while creating new files and folders.
{% endhint %}
## Sequence of preference
Mosaic implements following sequence of override preference (from highest priority to lowest):
1. Your theme's files
2. Parent theme's files
3. Extensions files
An **extension** cannot override **another extension's** file
# Module preferences
Mosaic introduces concept of module preference. **This is a feature of** [**extensions**](broken://pages/-MXlBPS6g2vhjkTrAhpH).
{% hint style="info" %}
**To preference a module** means to take-over another NPM or virtual module. To take-over means to completely replace an implementation, the original module will not be available.
{% endhint %}
To preference a module, set the `mosaic.preference` field of `package.json` equal to the desired module name.
{% hint style="danger" %}
## Watch out!
This is very dangerous to preference a real NPM module, like in example `react` or `redux`. While it is possible do that, this feature is meant only for [virtual module preference](broken://pages/-MXlBPS6g2vhjkTrAhpH#virtual-module-preference).
{% endhint %}
## Virtual module preference
Mosaic introduces the concept of "virtual module".
{% hint style="info" %}
**Virtual module** - a non-existing module, referenced in the code. It provides an abstraction layer, which allows to swap the implementation.
{% endhint %}
Virtual modules are useful for UI elements, where different libraries could be used as an implementation, or for an API endpoints, where the application is relying on data format, not the source of the data.
To create a virtual module, define the reference to a non existing module, and [implement a preference](broken://pages/-MXlBPS6g2vhjkTrAhpH#extension-module-preference) in your extension to it. To ensure that it does not exist, use `@virtual-module/` name for it.
{% hint style="danger" %}
## Watch out!
This is a subject to change. We plan on providing a more robust way to depend on virtual modules. **They should be coupled with typescript interfaces**. Currently, virtual-modules only work on the level of module resolution, they do not provide any interface for the implementation.
{% endhint %}
# File provisioning
Mosaic introduces concept of "file provisioning". **This is a feature of**[ **extensions**](broken://pages/-MXlBPS6g2vhjkTrAhpH).
{% hint style="info" %}
**To provide a file** - means to add a file into the "override" tool-chain with a lowest priority. This would make it discoverable by compiler, while any theme will be able to easily override it.
{% endhint %}
This is commonly used by extensions which replace the web application's entry point. It makes it possible to compile an application using some other HTML entry-point without manually defining it in a theme.
To provide a file in some mosaic extension, set the `mosaic.provide` field of its `package.json` equal to an array, and populate it with desired path to provision.
{% code title="package.json" %}
```javascript
{
"mosaic": {
"provide": ["public/index.html"]
}
}
```
{% endcode %}
# How does it work?
Explanation of Mosaic's work mechanics
This article mostly is for the contributors who are willing to enhance the Mosaic's core package's (`@tilework/mosaic`) behaviour with additional functionality.
Read the code for more information, or feel free to use our [Github Discussions](https://github.com/tilework/mosaic/discussions) to ask us for specifics!
## Features
`middleware` - a method to attach a namespace to a piece of functionality and ensure the plugins work for that namespace
`Extensible` - a method to ensure proper context during the construction of the given class. Important for interception of class properties being declared with [class property syntax](https://babeljs.io/docs/en/babel-plugin-proposal-class-properties/) during their initialisation in the constructor
`setPlugins` - a method that accepts an array of modules (which are `.plugin.js` files), sets the internal property and exposes it to the window object.
## How ?
The `middleware` function wraps functionality (further - "middlewarable") into a [Proxy](https://developer.mozilla.org/en-US/docs/Web/JavaScript/Reference/Global_Objects/Proxy), and assigns a [namespace](/develop-an-extension/namespaces) to it.
#### If the middlewarable is a function
When it is called, the following happens:
1. The plugins are being extracted from the `lib/plugins/plugin-storage`
2. These plugins are wrapped around the initial function, thus generating a new function
3. This function is called on the original arguments
#### If the middlewarable is a class
During the `new` call, the following happens:
1. `Extensible` ensures that the instance is a [Proxy](https://developer.mozilla.org/en-US/docs/Web/JavaScript/Reference/Global_Objects/Proxy) from the very beginning, this Proxy intercepts all members' accesses and applies plugins on the fly
2. All of the `member-property` plugins are applied to it, replacing the original properties with the ones the plugins result into.
Afterwards, when the object is used, the following happens:
1. When calling any member of the instance, the plugin storage is scanned for the plugins for that member, and if any are found - they are applied to the callable member before executing it
Also, the following is applied to the class itself
1. The class itself is a [Proxy](https://developer.mozilla.org/en-US/docs/Web/JavaScript/Reference/Global_Objects/Proxy), to ensure that calls to static properties are handled as member properties - by immediate replacement. It is a proxy only when is accessed from within its instance, otherwise it is not a proxy.
#### If the middlewarable is a primitive
This is not supported